

37 Water Science Experiments: Fun & Easy
We’ve curated a diverse selection of water related science experiments suitable for all ages, covering topics such as density, surface tension, water purification, and much more.
These hands-on, educational activities will not only deepen your understanding of water’s remarkable properties but also ignite a passion for scientific inquiry.
So, grab your lab coat and let’s dive into the fascinating world of water-based science experiments!
Water Science Experiments
1. walking water science experiment.
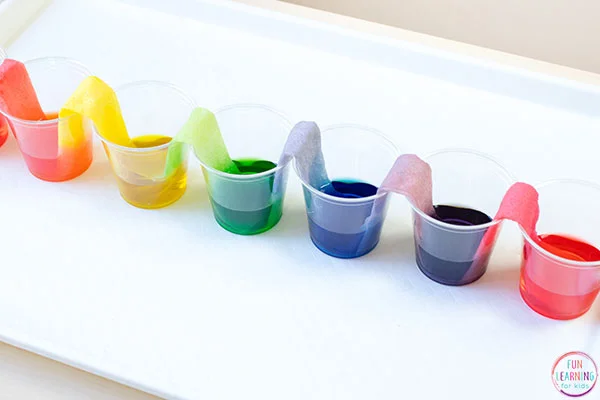
This experiment is a simple yet fascinating science experiment that involves observing the capillary action of water. Children can learn a lot from this experiment about the characteristics of water and the capillary action phenomenon. It is also a great approach to promote scientific curiosity and enthusiasm.
Learn more: Walking Water Science Experiment
2. Water Filtration Experiment
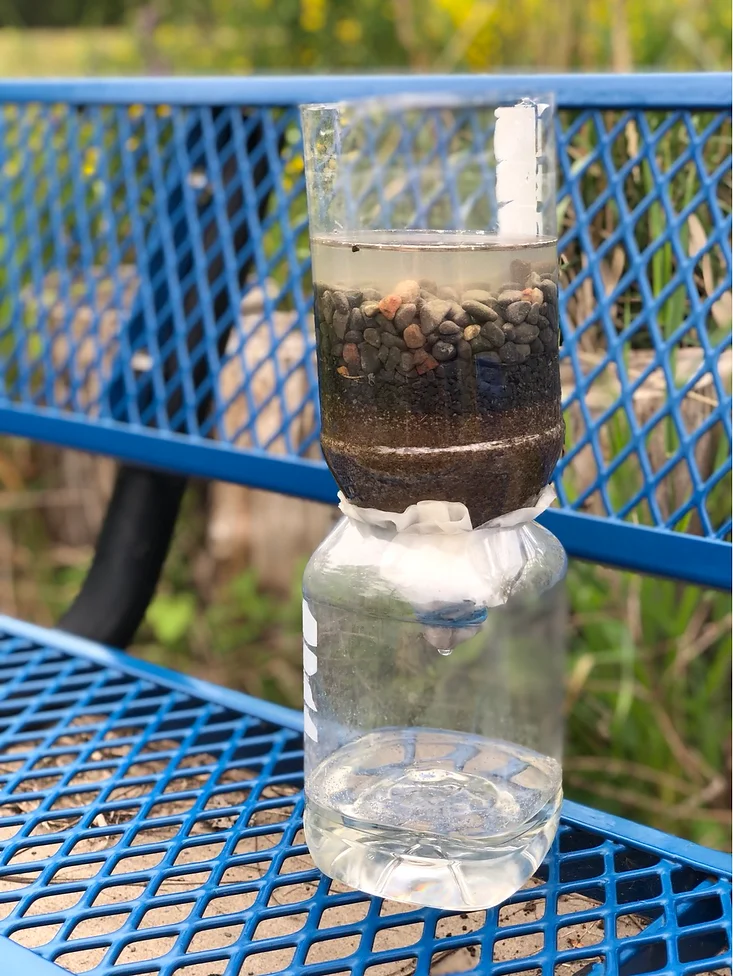
A water filtering experiment explains how to purify contaminated water using economical supplies. The experiment’s goal is to educate people about the procedure of water filtration, which is crucial in clearing water of impurities and contaminants so that it is safe to drink.
Learn more: Water Filtration Experiment
3. Water Cycle in a Bag
The water cycle in a bag experiment became to be an enjoyable and useful instructional exercise that helps students understand this idea. Participants in the experiment can observe the many water cycle processes by building a model of the water cycle within a Ziplock bag.
4. Cloud in a Jar
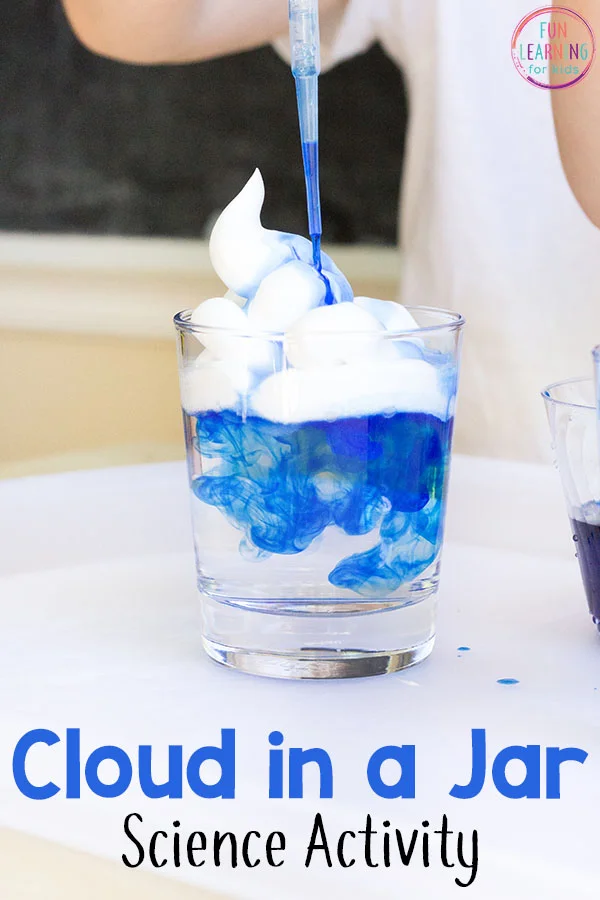
The rain cloud in a jar experiment is a popular instructional project that explains the water cycle and precipitation creation. This experiment is best done as a water experiment since it includes monitoring and understanding how water changes state from a gas (water vapor) to a liquid (rain) and back to a gas.
Learn more: Cloud in a Jar
5. The Rising Water
The rising water using a candle experiment is a wonderful way to teach both adults and children the fundamentals of physics while also giving them an exciting look at the properties of gases and how they interact with liquids.
6. Leak Proof Bag Science Experiment
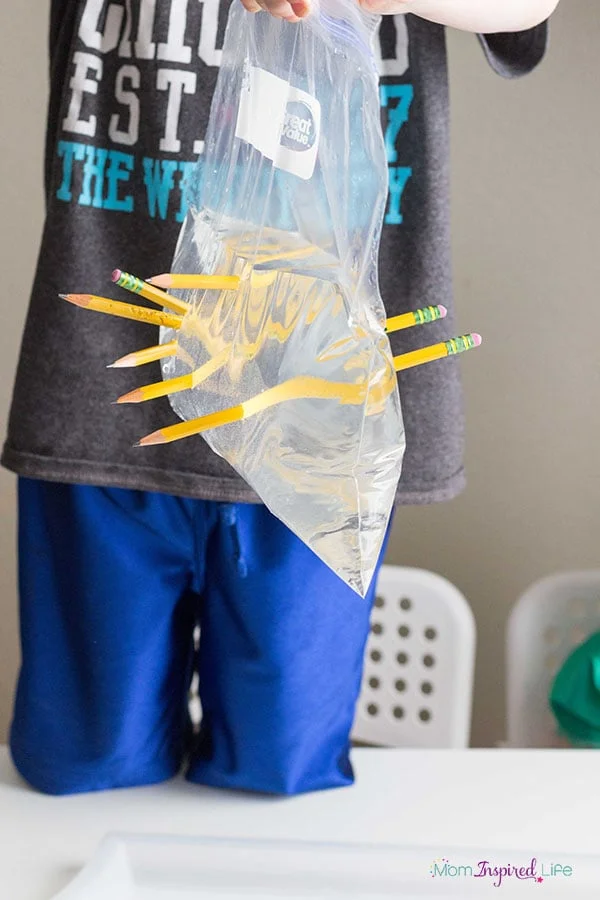
In the experiment, a plastic bag will be filled with water, and after that, pencils will be inserted through the bag without causing it to leak.
The experiments explain how the plastic bag’s polymer chains stretch and form a barrier that keeps water from dripping through the holes the pencils have produced.
Learn more: Leak Proof Bag Science Experiment
7. Keep Paper Dry Under Water Science Experiment
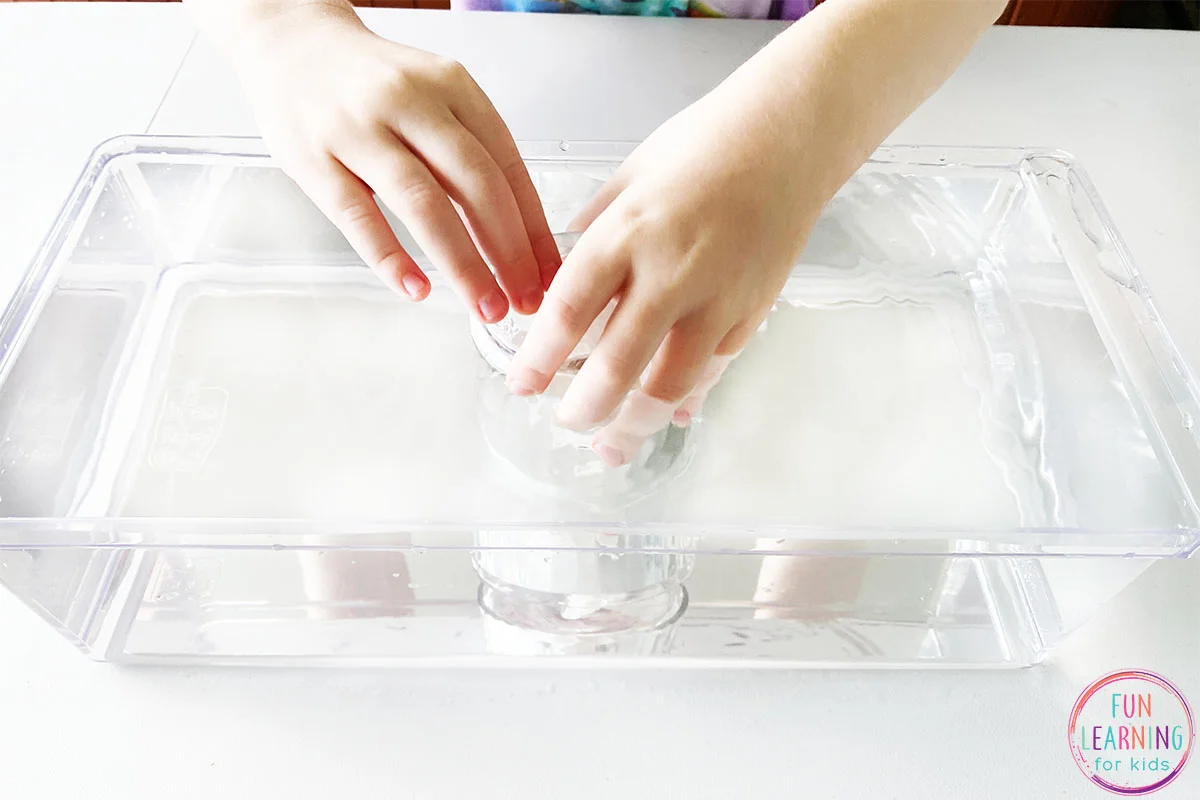
The experiment is an enjoyable way for demonstrating air pressure and surface tension for both adults and children. It’s an entertaining and engaging technique to increase scientific curiosity and learn about scientific fundamentals.
Learn more: Keep Paper Dry Under Water Science Experiment
8. Frozen Water Science Experiment
The Frozen Water Science Experiment is a fun and engaging project that teaches about the qualities of water and how it behaves when frozen.
You can gain a better knowledge of the science behind the freezing process and investigate how different variables can affect the outcome by carrying out this experiment.
9. Make Ice Stalagmites
10. Bending of Light
A fascinating scientific activity that explores visual principles and how light behaves in different surfaces is the “bending of light” water experiment. This experiment has applications in physics, engineering, and technology in addition to being a fun and interesting method to learn about the characteristics of light.
11. Salt on a Stick
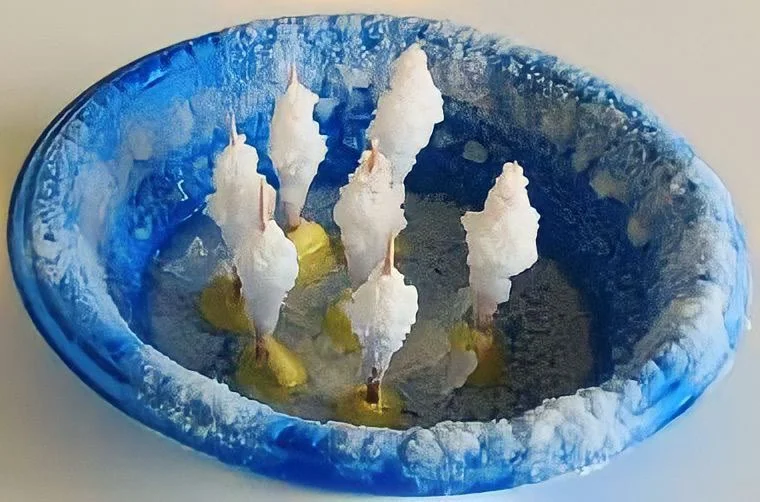
This experiment is an excellent way to catch interest, engage in practical learning, and gain a deeper understanding of the characteristics of water and how they relate to other substances. So the “Salt on Stick” water experiment is definitely worth trying if you’re looking for a fun and educational activity to try!
Learn More: Water Cycle Experiment Salt and Stick
12. Separating Mixture by Evaporation
This method has practical applications in fields like water processing and is employed in a wide range of scientific disciplines, from chemistry to environmental science.
You will better understand the principles determining the behavior of mixtures and the scientific procedures used to separate them by performing this experiment at home.
13. Dancing Spaghetti
Have you ever heard of the dancing spaghetti experiment? It’s a fascinating science experiment that combines simple materials to create a mesmerizing visual display.
The dancing spaghetti experiment is not only entertaining, but it also helps you understand the scientific concepts of chemical reactions, gas production, and acidity levels.
14. Magic Color Changing Potion
The magic color-changing potion experiment with water, vinegar, and baking soda must be tried since it’s an easy home-based scientific experiment that’s entertaining and educational.
This experiment is an excellent way to teach kids about chemical reactions and the characteristics of acids and bases while providing them an interesting and satisfying activity.
15. Traveling Water Experiment
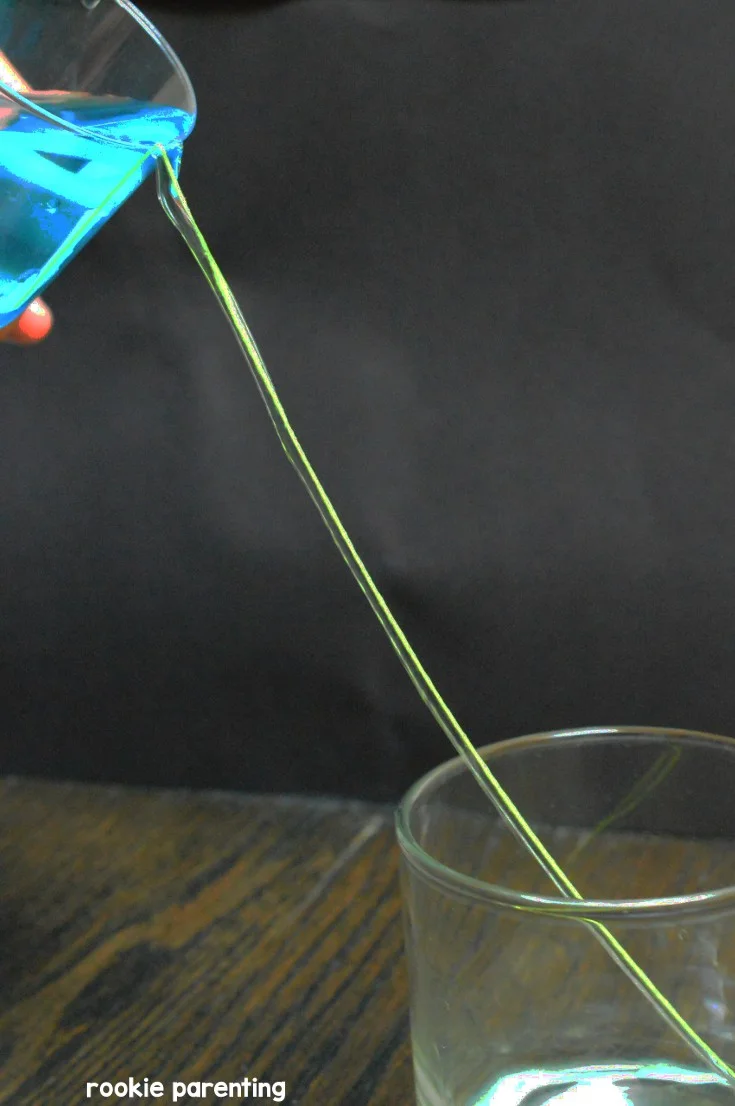
In this experiment, you will use simple objects like straws or strings to make a path for water to pass between two or more containers.
Learn more: Rookie Parenting
16. Dry Erase and Water “Floating Ink” Experiment
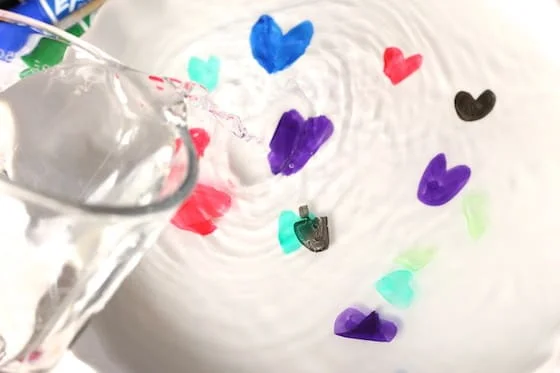
The dry-erase and water “floating ink” experiment offers an interesting look at the characteristics of liquids and the laws of buoyancy while also being a great method to educate kids and adults to the fundamentals of science.
Learn more: Dry Erase and Water Floating Ink Experiment
17. Underwater Candle
In this experiment, we will investigate a connection between fire and water and learn about the remarkable factors of an underwater candle.
18. Static Electricity and Water
19. Tornado in a Glass
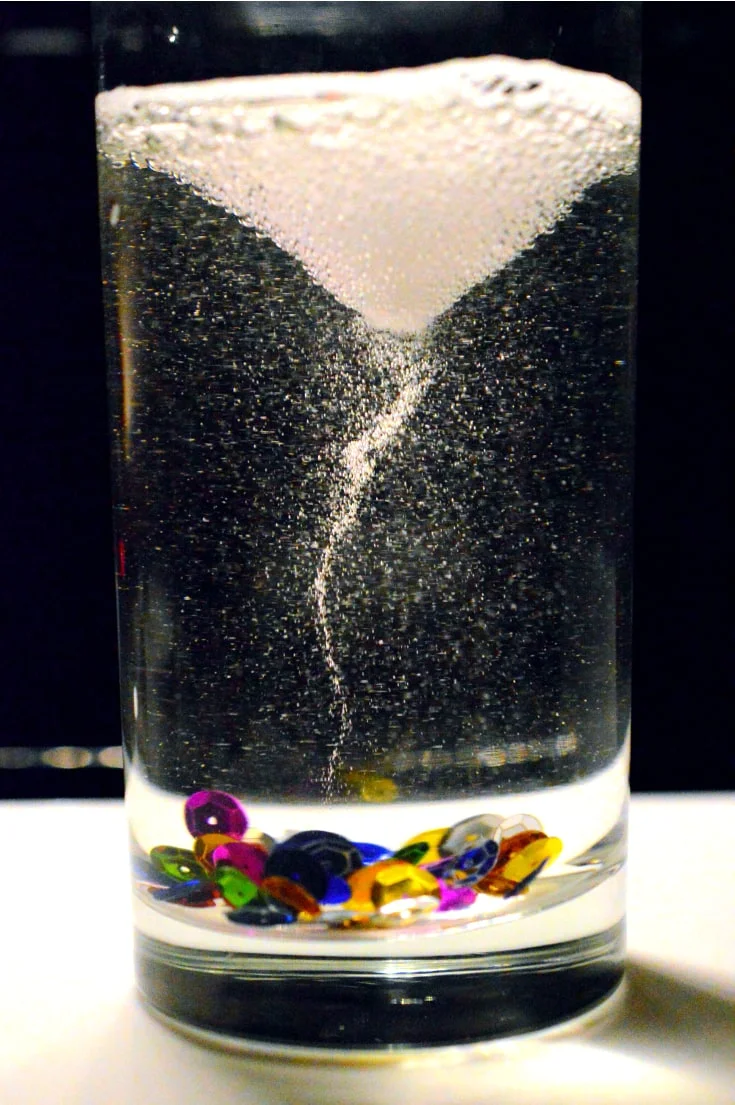
This captivating experiment will demonstrate how the forces of air and water can combine to create a miniature vortex, resembling a tornado.
Learn more: Tornado in a Glass
20. Make Underwater Magic Sand
Be ready to build a captivating underwater world with the magic sand experiment. This experiment will examine the fascinating characteristics of hydrophobic sand, sometimes referred to as magic sand.
21. Candy Science Experiment
Get ready to taste the rainbow and learn about the science behind it with the Skittles and water experiment! In this fun and colorful experiment, we will explore the concept of solubility and observe how it affects the diffusion of color.
Density Experiments
Density experiments are a useful and instructive approach to learn about the characteristics of matter and the fundamentals of science, and they can serve as a starting point for further exploration into the fascinating world of science.
Density experiments may be carried out with simple materials that can be found in most homes.
This experiment can be a great hands-on learning experience for kids and science lovers of all ages.
22. Super Cool Lava Lamp Experiment
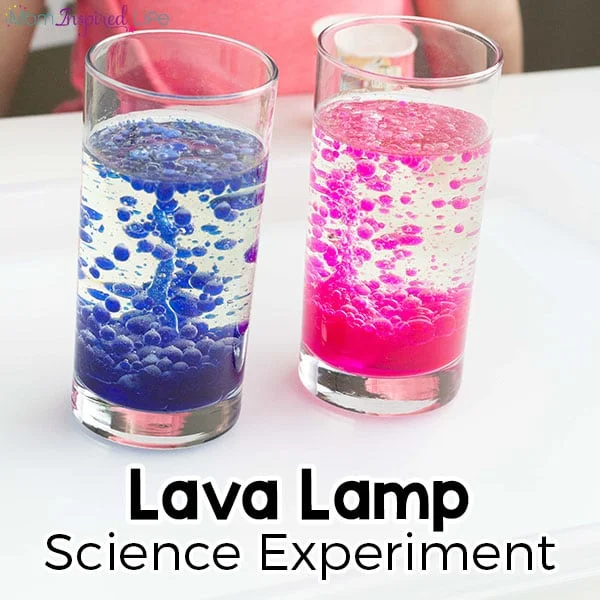
The awesome lava lamp experiment is an entertaining and educational activity that illustrates the concepts of density and chemical reactions. With the help of common household items, this experiment involves making a handmade lava lamp.
Learn more: Lava Lamp Science Experiment
23. Denser Than you Think
Welcome to the fascinating world of density science! The amount of matter in a particular space or volume is known as density, and it is a fundamental concept in science that can be seen everywhere around us.
Understanding density can help us figure out why some objects float while others sink in water, or why certain compounds do not mix.
24. Egg Salt and Water
Learn about the characteristics of water, including its density and buoyancy, and how the addition of salt affects these characteristics through performing this experiment.
25. Hot Water and Cold-Water Density
In this experiment, hot and cold water are put into a container to see how they react to one other’s temperatures and how they interact.
Sound and Water Experiments
Have you ever wondered how sound travels through different mediums? Take a look at these interesting sound and water experiments and learn how sounds and water can affect each other.
26. Home Made Water Xylophone
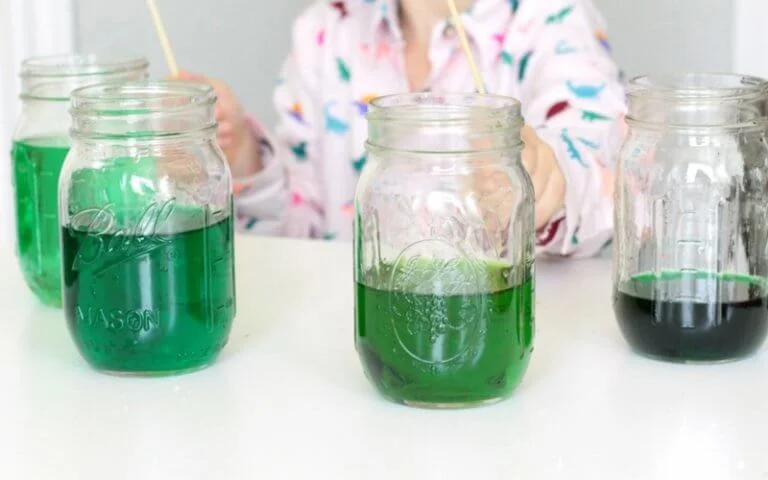
You can do this simple scientific experiment at home using a few inexpensive ingredients to create a handmade water xylophone.
The experiment demonstrates the science of sound and vibration and demonstrates how changing water concentrations can result in a range of tones and pitches.
Learn more: Home Made Water Xylophone
27. Create Water Forms Using Sound!
A remarkable experiment that exhibits the ability of sound waves to influence and impact the physical world around us is the creation of water formations using sound.
In this experiment, sound waves are used to generate patterns and shapes, resulting in amazing, intricate designs that are fascinating to observe.
28. Sound Makes Water Come Alive
These experiments consist of using sound waves to create water vibrations, which can result in a variety of dynamic and captivating phenomena.
29. Water Whistle
The water whistle experiment includes blowing air through a straw that is submerged in water to produce a whistle.
This experiment is an excellent way to learn about the characteristics of sound waves and how water can affect them.
Water Surface Tension Experiments
You can observe the effects of surface tension on the behavior of liquids by conducting a surface tension experiment.
By trying these experiments, you can gain a better understanding of the properties of liquids and their behavior and how surface tension affects their behavior.
30. Floating Paperclip
In this experiment, you will put a paper clip on the top of the water and observe it float because of the water’s surface tension.
31. Water Glass Surface Tension
Have you ever noticed how, on some surfaces, water drops may form perfect spheres? The surface tension, which is a characteristic of water and the cohesive force that holds a liquid’s molecules together at its surface, is to blame for this.
32. Camphor Powered Boat
The camphor-powered boat experiment is a fun and fascinating way to explore the principles of chemistry, physics, and fluid mechanics. In this experiment, a miniature boat is used to travel across the water’s surface using camphor tablets.
33. Pepper and Soap Experiment
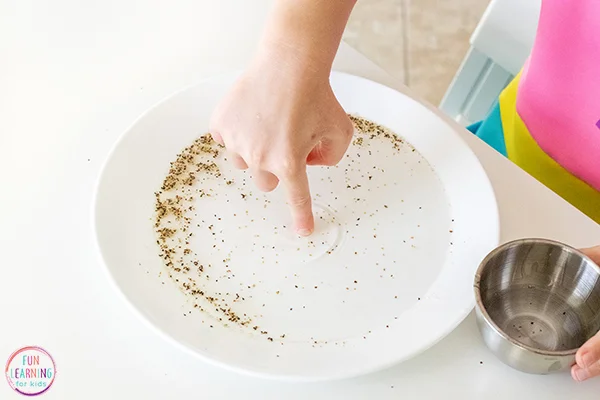
The pepper in a cloud experiment is a simple and interesting activity that explains the concept of surface tension. This experiment includes adding pepper to a bowl of water and then pouring soap to the mixture, causing the pepper to move away from the soap.
Learn more: Pepper and Soap Experiment
Boiling Water Experiments
Experiments with boiling water are an engaging and informative way to learn about physics, chemistry, and water’s characteristics.
These investigations, which include examining how water behaves when it changes temperature and pressure, can shed light on a variety of scientific phenomena.
It’s important to take the proper safety measures when performing experiments with hot water. Boiling water can produce steam and hot particles that are dangerous to inhale in and can result in severe burns if it comes into contact with skin.
34. Make It Rain
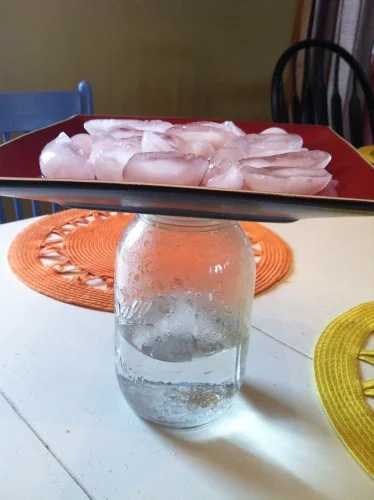
This experiment can be accomplished using basic supplies that can be found in most homes, make it an excellent opportunity for hands-on learning for both kids and science lovers.
Learn more: Make it Rain
35. Fire Water Balloons
Learning about the fundamentals of thermodynamics, the behavior of gases, and the effects of heat on objects are all made possible by this experiment.
36. Boil Water with Ice
The Boiling Water with Ice experiment is an engaging and beneficial approach to learn about temperature and the behavior of water. It can also serve as an introduction for further discovery into the wonderful world of science.

37. Boil Water in a Paper Cup
The “boil water in a cup” experiment is an easier but powerful approach to illustrate the idea of heat transmission by conduction. This experiment is often used in science classes to teach students about thermal conductivity and the physics of heat transfer.
Similar Posts:
- 68 Best Chemistry Experiments: Learn About Chemical Reactions
- Top 100 Fine Motor Skills Activities for Toddlers and Preschoolers
- Top 50 Fun Food Science Experiments
Leave a Comment Cancel reply
Save my name and email in this browser for the next time I comment.

Water Cycle, Rain Cycle Science Experiments and Craftivity
Let’s learn about the water cycle 3 simple water cycle experiments & a craftivity.
Here are 3 of my favorite water cycle experiments as well as a craftivity. These science experiments are simple to set up and use common household items. The water cycle wheel craftivity gives students a visual representation of the stages of the water cycle and how they repeat over and over again.
First, introduce your students to the water cycle and the following terms: evaporation, condensation, precipitation, collection.
The earth has a limited amount of water. This water keeps going around and around in what we call the water cycle. When the sun heats the water in the lakes, streams, oceans, etc. some of it turns to a gas (water vapor). This is called evaporation . This invisible water vapor is light and rises into the air.
When the water vapor hits the cold air high up in the atmosphere it turns back to water droplets and collects in clouds. This is called condensation.
When too many water droplets form in a cloud, the cloud gets heavy and the water falls back to the earth in the form of rain, hail, sleet, or snow. This is called precipitation.
When the water falls back to the earth, it may fall back in the streams, lakes, ocean, etc. or it may fall on the land. This is called collection . When it falls on the land, it either soaks into the earth for plants to drink or runs over the soil and back into the streams, lakes, oceans, etc. and the cycle begins all over again.
I like using word wall cards as visual aides to help reinforce the words and their meanings. I use one set for student use in the writing center and another set for instruction and our word wall.

These simple science experiments will help demonstrate the water cycle or parts of the water cycle.
Experiment 1
Items Needed: large bowl mug or small cup plastic wrap string or large rubber band water
Place the mug or small cup in the center of the bowl. Fill the bowl with water about 2/3 of the way up the cup (do not put water inside the cup).

Cover the bowl with saran wrap and either tie it with string or place a large rubber band around it to secure the plastic wrap.

Place it outside in a sunny area for a few hours.

After several hours, allow students to observe the bowl. The plastic wrap will have condensation and some of the condensation will have dripped or fallen into the cup/mug.

This experiment demonstrates the heat of the sun turning the water in the bowl to vapor (evaporation). The vapor turning back to water droplets on the saran wrap (condensation), drops getting too heavy and falling back down (precipitation) to the water in the bowl or in the mug which represents mountains or land (collection).
After the experiment I check students’ understanding of the water cycle vocabulary words and how the experiment demonstrated each stage of the water cycle by having them label a picture of the experiment.

Seesaw, Google Slides, or Pic Collage (Pic Kids) can also be used to check students’ understanding of the stages of the water cycle and how they were demonstrated in the experiment. Take pictures of the experiment and have students insert them in the appropriate places.

Experiment 2
Items Needed: Ziploc baggie tape blue food coloring (optional) marker (optional) water
If desired, draw water, a cloud, and a sun on the Ziploc baggie with a marker.

Add a small amount of water to the baggie without getting the sides wet.

Add a few drops of blue food coloring to the water (optional).

Hang on a sunny window for several hours.

After several hours or when heavy condensation appears on the bag, remove the bag and allow students to observe. Tap the bag, if necessary, to make the water droplets fall.

This experiment allows students to observe the water from the bag evaporating, condensing, falling like precipitation, and collecting again at the bottom. Notice that the water does not stay blue once it evaporates. This is because the food coloring is heavier than the water vapor and thus stays down, much like the salt from the ocean water.
After the experiment, check students’ understanding by having them draw and label a picture of the experiment using the water cycle vocabulary words or use Seesaw, Pic Collage (Pic Kids), or Google Slides to insert a photo of the experiment and label it with the text feature.

Experiment 3
Items Needed: shaving cream small glass medium glass straw or eye dropper blue food coloring water
Place approximately 3 tablespoons of water in the small glass and add about 10 drops of blue food coloring.

Fill the medium glass with water. Add 1-3 inches of shaving cream to the top. The more shaving cream used the longer the experiment will last.

Add the colored water to the shaving cream drop by drop using an eye dropper or by dipping the straw in the colored water, placing your finger over the end, holding it over the shaving cream, and lifting your finger enough to allow drops of colored water to drip onto the shaving cream.

Continue dropping the water onto the shaving cream until you observe it getting too heavy and “rain” starting to come out below. Depending on the amount of shaving cream used, this could take anywhere from 40-100 drops.

This experiment demonstrates what happens in the clouds during the water cycle. When a cloud accumulates too many water droplets they fall in the form of precipitation. In the experiment, after a certain point the shaving cream can no longer absorb the water drops and gravity pulls them down into the water.
Optional: Prior to dropping the water in the shaving cream cloud, have students predict how many drops of water they think the cloud will hold before it starts to “rain” and have them record it. During the experiment, count the number of drops and compare it to students’ guesses.
After the experiment have students draw and explain what they learned.

Water Cycle Wheel Craftivity
As a culminating activity, have students color a picture of the water cycle, label it using the vocabulary words, and glue it to a paper plate.

Make a raindrop “arm” and attach it to the paper plate with a brass fastener. Students move the raindrop through the different stages of the water cycle. This gives students a visual representation of the water cycle and how it repeats over and over again.

If you would like to use the printable pages and patterns for the water cycle wheel craftivity with your students, they are available here along with additional crafts and activities.

What fellow teachers are saying about these activities and resource:
“Love this! It is one of the best products I have!” – Krystal L.
“LOVE, LOVE, LOVE! This product included so many fun activities to teach about the water cycle. My students were definitely engaged and begging for more.” – Keeping it Cool in Kindergarten
“Cannot say how much I loved this! My Kinders had so much fun with the activities I got from this, and it was the perfect accessory to our water cycle unit! Love it.” – Vanessa G.
“So many great resources for the price! My kids LOVED this!! I could not believe how many great activities were in here. Print and go…. AWESOME!” – Ewa B.
“This is an amazing resource. A wide range of experiments and activities. My students were engaged the ENTIRE time! Thank you so much!” – Buyer
“The best water cycle activity out there!” – Leslie B.
“My students loved the experiments. I have done these experiments before, however the difference is the detailed recording sheets are sooo much better than what I have done. They helped solidify the learning experiences from the experiment and bring everything all together.” – Mountain view learning
“My students loved these Water Cycle experiments! I believe the water cycle is a hard concept for first graders to grasp but this resource made it much easier for them to understand. Plus this resource is so fun!” – Krista B.
“This was awesome! My Grade 2 kids loved the activities and really got interested in science!” – Rebecca T.
“This resource contains so much – step-by-step experiments with recording sheets, crafts, cut & paste diagrams, a relevant book list – I have been able to choose the best activities for each class as well as the supplies I have available. Wonderful!” – Camille W.
“I love this unit! It perfectly covers our 2nd grade standard and my kids loved it!” – Sarah R.
“As I am in a hybrid learning environment currently, this resource was used for both in person and online work. The families LOVED the easy to follow experiments and the hands on water cycle project really helped them synthesize the content.” – Megan R.
“My kiddos enjoyed having this packet. Parents said they appreciated the experiments because it made learning at home more engaging. Was able to use quickly for remote learning due to COVID 19. Thank you!” – Najah L.
“This resource was so easy to use for distance learning. I was able to send select pages to my students for them to do their experiments at home!” – Sydney W.
Have engaging science experiments and STEM activities throughout the entire school year with this money-saving Science & STEM Bundle !

You may also like:
St. patrick’s day rainbow experiment, math activity, writing craftivity & game.
Pin it for later!

Share this:

Hi! Thanks for stopping by!
I’m Tina and I’ve taught preK and K for 20+ years. I share fun and creative ideas that spark your students’ love for learning.
-Featured Products-

Follow my TpT store to find out about new resources & freebies!
-Affiliate Disclosure-
Some of the Amazon links on Lessons for Little Ones are affiliate links. If you purchase a product after clicking an affiliate link, I receive a small percentage of the sale for referring you, at no extra cost to you. Purchasing through affiliate links is an easy, painless way to help out your favorite bloggers. Thank you so much for your continued support!
© 2023 Lessons for Little Ones by Tina O’Block
Privacy Policy | Designed by Megan Milton
© 2023 Lessons for Little Ones by Tina O’Block
Discover more from Lessons for Little Ones by Tina O'Block
Subscribe now to keep reading and get access to the full archive.
Type your email…
Continue reading

5 Water Cycle Experiments You Need to Try
Just so you know, this post contains affiliate links. That means if you use them to make a purchase, I may earn a commission. You can read my full affiliate disclosure HERE .
Water cycle experiments have a unique way of adding hands-on fun to your lesson plans. Whether you’re homeschooling one or multiples, I highly recommend trying these in your homeschool!
How to Include Water Cycle Experiments in Your Lesson Plans
Unit studies are a great option for homeschooling families (and you can find a bunch of Online Unit Studies I created at Techie Homeschool Mom ). Why do I love them? Well, for starters, we have four kiddos ranging from 3 to 10 years old. There are many times we like to learn about a topic all together – so, to make it easier I go to unit studies!
When doing a unit study, you’re often left to piecing together your own curriculum and resources to use. Again, this can be another perk of using this method. Instead of feeling like you have to stick to a rigorous plan or schedule, you can create your own plans.
For example, if you’re studying the weather, there are so many books and free online printables you can use (like this free printable weather activity pack ) to build a great study! And, don’t forget the activities!
When you’re studying anything about the weather, these water cycle experiments are worth a try. Simply set aside 20-30 minutes to do them with your kids – they’ll love them. Try one or try them all!

5 Water Cycle Experiments to Try in Your Homeschool
Each of these can be modified for any age and grade. In fact, I recommend putting all hands on deck for lots of learning fun.
Indoor Water Cycle Experiments
Although we can witness parts of the water cycle by seeing clouds in the sky, rain on rainy days, and dew drops on a cool morning, each step of it is not always visible. This experiment will help you physically see each step up close and personal…not to mention, in real time.
- Large Glass Bowl
- Small Glass Bowl
- Boiling Water
- Salt (optional)
Directions:
- Add 2 tsp of salt into the large glass bowl. This is an optional step and will allow kids to taste the natural filtering of the water that takes place during the cycle process.
- Pour boiling water into the glass bowl and mix until all of the salt has dissolved.
- Place the small bowl in the center of the large bowl (make sure it doesn’t float).
- Cover the large bowl with cling wrap (not too tight or too loose).
- Place a handful of ice cubes in the center of the cling wrap.
- Let the natural process of the water cycle begin.
Learn About Evaporation with Salt
Evaporation is a type of vaporization that occurs on the surface of a liquid as it changes into the gas phase. This experiment will show how this process works using salt.
- Food coloring
- Pour water into your bowl and add a few drops of food coloring to it, stir it around.
- Add your salt to the the water. The more salt you add, the more dramatic the effect.
- Set aside for a few days and watch to see what happens!
How do clouds make rain?
We can see clouds in the sky and we can see rain when it falls. What isn’t as noticeable is the process right before it starts to rain.
Within a cloud, water droplets condense onto one another, causing the droplets to grow. When these water droplets get too heavy, it begins to rain. See if you can make this happen!
- clear cup (or mason jar)
- shaving cream
- food coloring (blue)
- Put water in the cup, leaving enough room for (shaving cream) clouds. The water represents “air.”
- Put a shaving cream cloud on the top. The cloud represents water droplets.
- Put blue food coloring on the cloud. This shows what happens when the water gets heavier.
- Wait to see what happens when the water gets heavy on the cloud.
Make a Rain Cloud in a Jar
When you look into the sky, you can visibly see clouds… but how did they get there?
A cloud is formed when water vapor condenses into water droplets that attach to particles (of dust, pollen, smoke, etc.) in the air. When billions of these water droplets join together, they form a cloud. Try to make your own cloud in a jar with this experiment!
- A jar with lid
- About 1/3 cup hot water
- Start by pouring the hot water into the jar. Swirl it around a bit to warm up the sides of the jar.
- Turn the lid upside down and place it on the top of the jar. Place several ice cubes onto the lid, and allow it to rest on the top of the jar for about 20 seconds.
- Remove the lid, quickly spray a bit of hairspray into the jar, and then replace the lid with the ice still on top. Watch the cloud form. Remove the lid to let the cloud escape
Water Cycle in a Bottle
This experiment will help you create your own biome in a bottle and watch the water turn into a gas, turn back into a liquid, and fall back into the bottom of the bottle. These are each valuable steps in the water cycle process.
- Plastic bottle
- Plastic cup
- Ice cubes (optional)
- Blue food coloring
- Permanent marker
- Remove the label from the bottle. Add a drop of blue food coloring to the bottle and fill about 1/3 of the way with water. Screw the cap on tightly.
- Turn the bottle upside down inside a cup.
- Place a couple of ice cubes on top of the bottle and set it in a sunny location.
- Check the bottle after about an hour.
Water Cycle Lapbook
In addition to these water cycle experiments, I have a Water Cycle Lapbook your kids might enjoy putting together during your water cycle unit study!

You can grab the printable Water Cycle Lapbook Project here .
And finally, no matter what science projects you do in your homeschool, I’ve got a free Scientific Method template you can use to easily help your kids learn the process of the scientific method. Click the banner below to grab yours!

I hope you love performing these water cycle experiments with your kids! Let me know in the comments: have you tried any of these? Which one was your favorite?

Related Posts
- Scientific Method for Kids: An Easy Step-by-Step Guide
- 5 Simple Nature Walk Resources for Your Homeschool
- Easy Water Cycle Project: Printable Lapbook Template
- Density Lesson Plan for Elementary {and a Freebie!}
Blessed Homeschool is a participant in the Amazon Services LLC Associates Program, an affiliate advertising program designed to provide a means for sites to earn advertising fees by advertising and linking to Amazon.com. You can read my full affiliate disclosure HERE.

More homeschool inspiration...

Leave a Reply Cancel reply
Your email address will not be published. Required fields are marked *

7 Amazing Ideas for Teaching the Water Cycle
The water cycle is the process by which water evaporates from the Earth’s surface, rises into the atmosphere, and falls back down to the surface as precipitation.
In this post, we explore 7 fun and engaging ideas for teaching kids about the water cycle. From hands-on investigations and activities to stations and task cards, these ideas will help kids learn about the water cycle in a meaningful and interactive way.
1. Observe a Water Cycle Baggie
This idea is an oldie, but a goodie.
It’s important for students to understand how the Sun and ocean interact in the water cycle. Water at the surface of the ocean evaporates and rises due to energy from the Sun. It becomes water vapor.
As the water vapor cools during condensation into liquid water, it gathers together in clouds. Then the liquid water falls as precipitation .
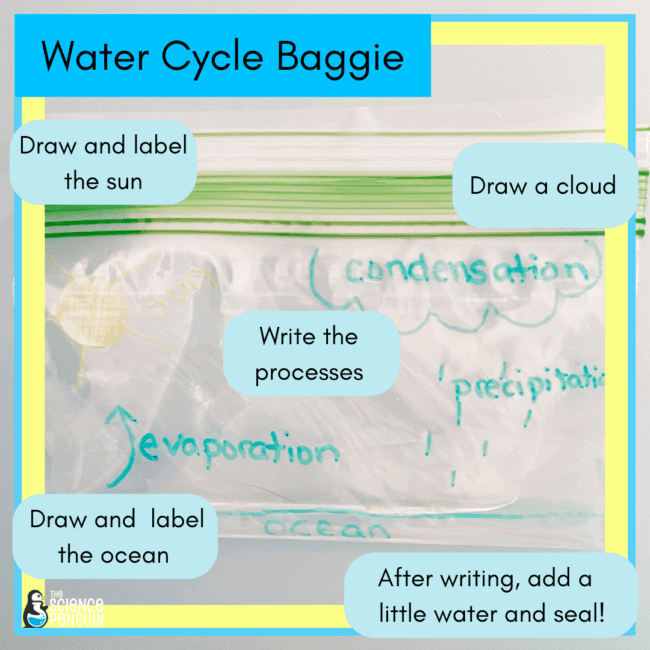
1. Draw the water cycle carefully on a baggie using a Sharpie. Don’t push too hard or your bag might rip!
Include the sun, a cloud, and the ocean. Also write the processes.
2. When you’re done writing, add some water to the bag, seal it shut, and tape it to the window.
3. Observe your water cycle baggie for a few days. You’ll see the evaporation and condensation right before your very eyes!
4. Be sure to have students record their observations and draw their water cycle baggies in their science notebooks!
2. Flip with a Water Cycle Flipbook
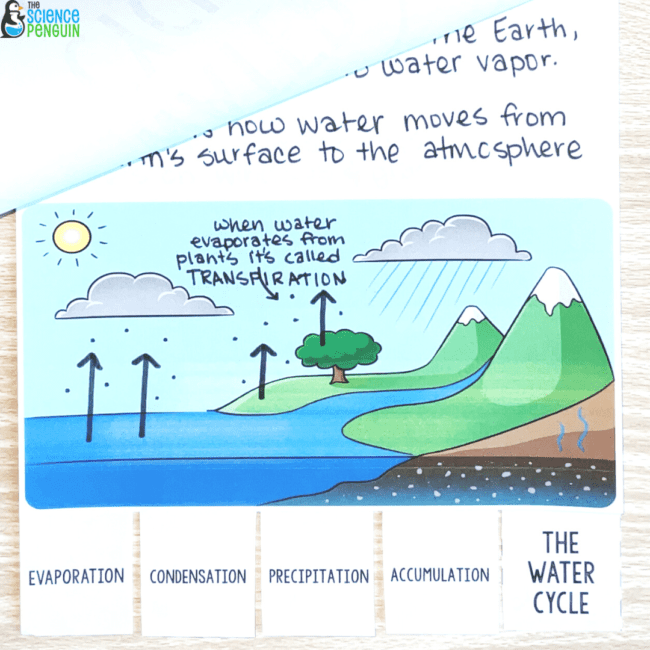
Need a NO PREP science review activity? Make a flip book to review the water cycle!
This flip book is easy to assemble and fun to create with students as they wrap up their learning.
Accompany this activity with a video from our friend at Mad Garden Science on YouTube.
See it on TPT: Water Cycle Flipbook
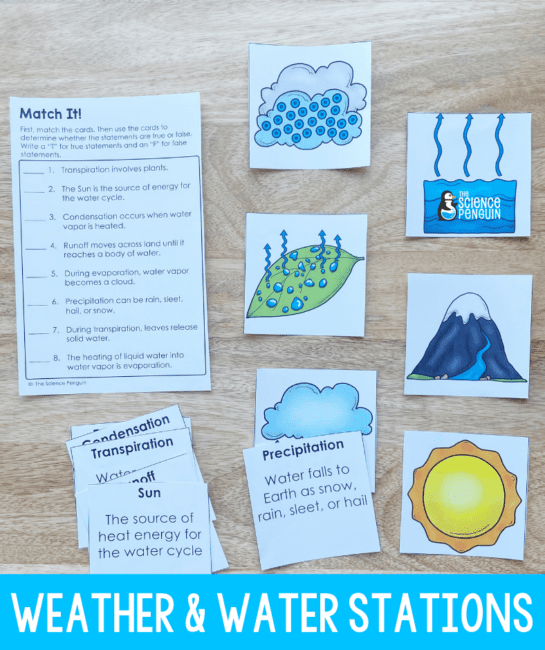
3. Weather and Water Stations
Study the water cycle alongside weather and climate with 9 easy prep station activities. This is a particularly great option if you’re short on time during your weather and water unit!
See it on TpT! Weather and Water Stations
5. Dive Deep with the Clouds Phenomena-based Science Unit
Teach your students the details of cloud formation and how clouds can help us predict the weather with this full unit!
You’ll use a cloud window to observe the weather each day, make predictions about the weather based on cloud types, support a claim with evidence and reasoning, and even make a cloud in a jar!
See it on TpT! Clouds and Weather Unit

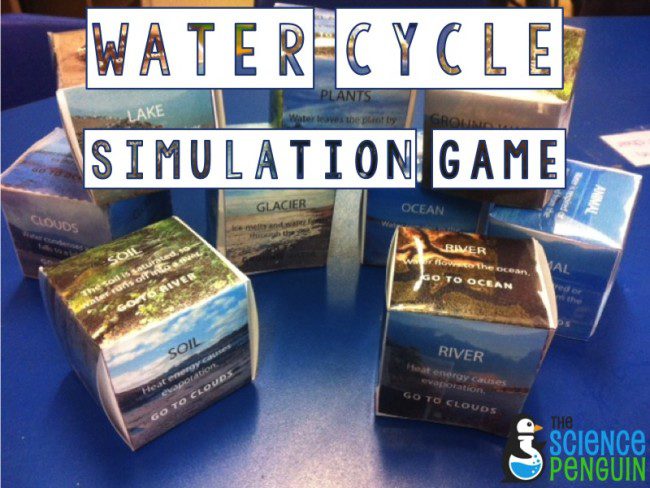
6. Roll the Dice with a Water Cycle Cube Simulation
This activity is a simulation game in which students move through the water cycle as a drop of water. The activity I used is no longer available but you can find something similar here .
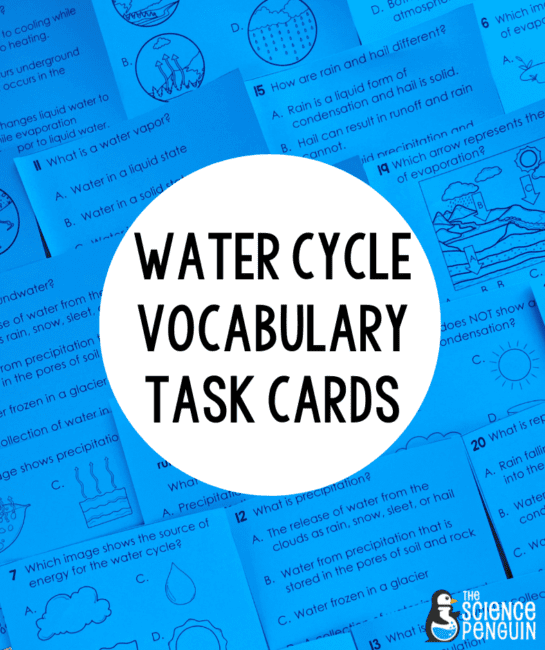
6. Assess with Water Cycle Task Cards
When it’s time to check for understanding, you’ll want to have some task cards on hand. I use two different sets– one for vocabulary and one with more rigorous questions for test prep.
See them on TpT!
Water Cycle Vocabulary Task Cards
Water Cycle Test Prep Task Cards
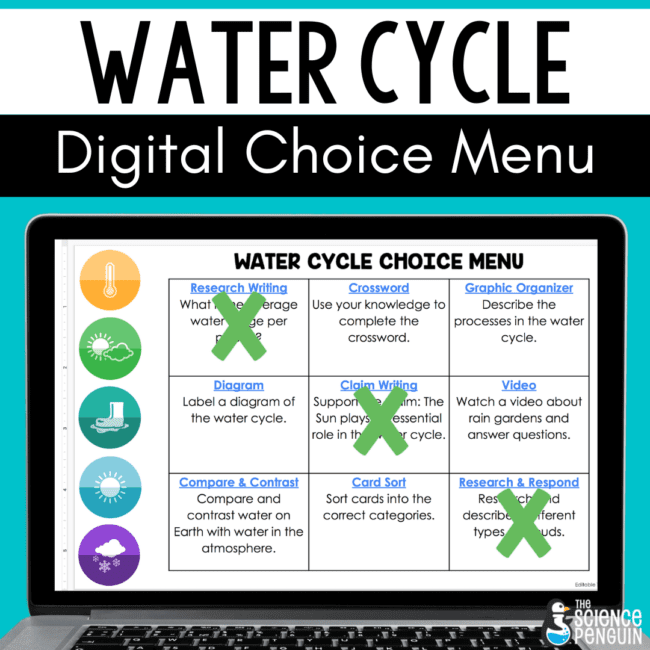
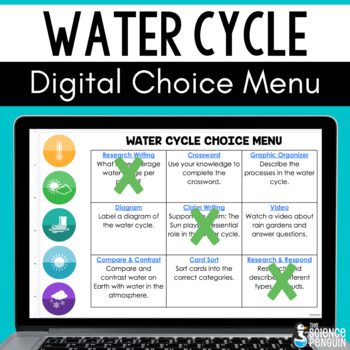
7. Enrich with a Water Cycle Digital Choice Menu
Use as enrichment! This digital choice board is perfect for advanced students who crave new learning and want to dive a little deeper into the topic of study.
The work is done for you to just assign and go!
See it on TPT: Water Cycle Digital Choice Menu
Top Teaching Tools
Try out these top teaching tools to help your students learn all about the water cycle!
Access the Free Resource Library
This is an exclusive library of 40+ science printables, labs, activities, and games for grades 3-6. Sign up and check your email for immediate access.
- Read more about: 4th Grade , 5th Grade , Earth Science
You might also like...
The Science Penguin Mini PD
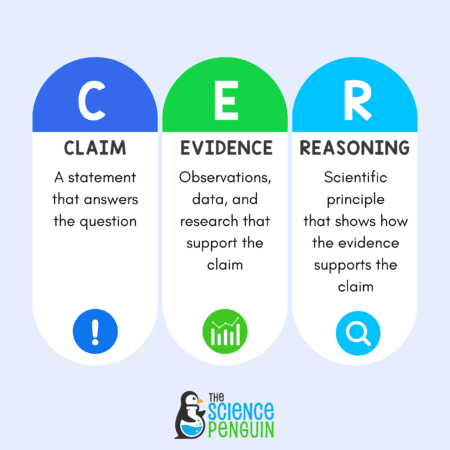
CER (Claim Evidence Reasoning) in 3rd, 4th, and 5th Grade Science
5th Grade Science STAAR: 3 Tips to Master Short Constructed Response (SCR)
5 thoughts on “7 amazing ideas for teaching the water cycle”.
Thanks for sharing these great ideas! I always like to follow up my version of the water cycle simulation by having my students (2nd grade) create a comic strip that follows their “journey” as they share these stories they see the patterns. I love teaching the water cycle, so many great experiences!
Love the comic strip!
Thanks for sharing the Ocean Notebook freebie!
Love the Water Cycle simulation cubes idea, but where do you find the cubes?
- Pingback: Water/Water cycle | Pearltrees
Comments are closed.

Hi, I'm Ari!
As a new teacher, I struggled to plan engaging, rigorous science lessons. Throughout my time teaching upper elementary and in my graduate studies, I discovered what worked well and developed science curriculum for busy teachers. Now, teachers across the country use Science Penguin activities every single day in their classrooms!
Want access to The Science Penguin Free Resource Library?
This is an exclusive library of 40+ science printables, labs, activities, and games for grades 3-6! Enter your personal email so your resources don't get stuck in a district filter!

IMAGES
COMMENTS
Aug 3, 2021 · Lesson Plans and Activities to Teach About the Water Cycle The System. 1. Miniature Model Water Cycle. In the Make a Miniature Water Cycle Model activity, students make a model of the water cycle in a plastic bag and use it to explore how water moves in and out of the atmosphere in a cycle of precipitation, evaporation, and condensation. The ...
Apr 21, 2024 · The water cycle in a bag experiment became to be an enjoyable and useful instructional exercise that helps students understand this idea. Participants in the experiment can observe the many water cycle processes by building a model of the water cycle within a Ziplock bag. 4. Cloud in a Jar
Find three simple water cycle experiments and a fun water cycle wheel craftivity! These activities use common household items and help students visually understand evaporation, condensation, precipitation, and collection. Learn how to make a water cycle wheel and engage students in hands-on science.
Mar 21, 2024 · Easy Working Indoor Water Cycle Science Experiment for Kids. This water cycle science activity proposes an engaging science activity visually explaining the water cycle. I love that it only uses a few supplies and is so easy to do!
You can grab the printable Water Cycle Lapbook Project here.. And finally, no matter what science projects you do in your homeschool, I’ve got a free Scientific Method template you can use to easily help your kids learn the process of the scientific method.
Feb 7, 2015 · 1. Draw the water cycle carefully on a baggie using a Sharpie. Don’t push too hard or your bag might rip! Include the sun, a cloud, and the ocean. Also write the processes. 2. When you’re done writing, add some water to the bag, seal it shut, and tape it to the window. 3. Observe your water cycle baggie for a few days.